If you are looking for a handful of practical tips for shooting awesome vacation videos, you are on the right page.
In this post we’re sharing 5 small tweaks coming from a guy who makes living as a videographer & video editor…
So stay tuned to step up your travel videos!
Vacation Video Tips: How To Shoot Awesome Footage
Tip #1 Film Horizontally
If you’re using a smartphone to capture the highlights of your travel video (which is totally fine since today’s high-end devices have awesome cameras), there’s a really quick and easy way to totally change up the look and feel of your video…
Simply tilt the phone around and start filming horizontally.
Even though this sounds like a no brainer, the truth is that the vast majority of people record videos vertically or in portrait mode. I guess this is simply because that’s how we are used to holding the phone.
But when you actually transfer your footage from your phone to your computer and start looking at those videos you’ll see just a tiny little image with big black bars on the sides…
Kind of like this:
Instead of like this:
There’s no question about which one looks better, so definitely remember to film horizontally from now on.
Your footage will look more professional, it will fill up the whole screen and you can do so much more in the post-production with horizontal videos when you edit them.
Tip #2 Don’t Shake It
Speaking of smartphone videos, another issue with these is that a lot of the shoots are shaky to say the least.
Shaky footage is not pleasant to watch, it makes the video look amateurish and that’s not something you can just edit out later on.
Nobody (or almost nobody) travels with a tripod on them, but there’s a quick fix to remove shakiness from hand held shots…
By keeping your hands really close your body, with the elbows tucked in, the shoot will be much more stable. And definitely use both hands when holding your phone or camera.
If you want to capture still videos – where the camera is not moving at all, but it captures the movement in the shoot instead – put it down on bench, a car or anything else that would work for that particular scene. This will basically work like a tripod.
Tip #3 Plan Your Shoots
Another thing you want to do is to plan a little bit what you want to film, and make it more like a scene from something that’s going to be a complete travel video later on.
Most people will just pull out their phone or camera and start pointing it at everything around them as they go.
Instead of doing that take a couple of minutes to look around you and decide what you would like to include in your travel video after all. Once you’ve figured that out, point the camera in the right direction and start filming just that.
It helps if you already have a pretty clear idea in mind of how you would want your final travel video to look like…
This way you’ll know which scenes would work and which would probably not work. You’ll also have more time for simply enjoying your trip rather than being obsessed with filming everything.
If you’re having trouble coming up with a theme or a style for your travel video, think about your favourite song or listen to the soundtrack that you want to use in your video…
That should help you to set the right mood and visualise how the clip should look like.
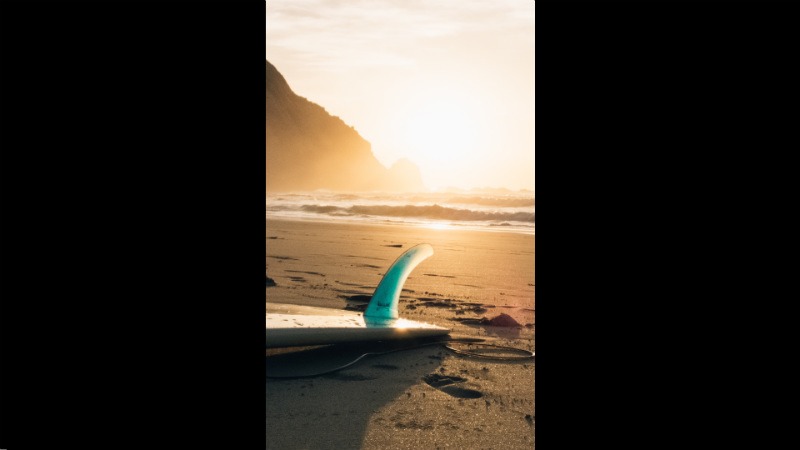
Tip #4 Film At The Right Time
This tip can make a ton of difference and it’s so simple to implement…
As you may know, lighting will greatly impact the way pictures and videos will look.
Everybody knows that cameras perform poor in darker environments, right? So it makes perfect sense to shoot at mid-day, right?
Well, not really.
Super bright scenes will mess with the sensor of most consumer cameras and you’ll end up with blown-out colours that just look dull.
There’s a thing among videographers and photographers called the “golden hour”, used to define that moment which can be either early in the morning (dawn), or later in the afternoon (sunset), when the sun is really close to the horizon line.
You know that time of the day when the sky looks like it’s on fire and the blend of light and shadows makes everything around look so epic? That’s basically what the “golden hour” means. And that’s when you want to film.
Your scenes will look so much better, guaranteed!
Tip #5 Slow Motion
Slow motion is huge! This will make a massive difference in your videos, so if you can shoot in slow motion, then you definitely should.
iPhones have this as a built-in feature and some higher-end Android phones have it too.
If you are using a DSLR, see if you can find the 120 fps for super smooth slow motion shoots, or at least the 60 fps. You will probably need to lower the resolution, but as long as it’s at least 720p you’ll be fine.
Slow motion footage will add a more cinematic and emotional feel to your videos, so do experiment with it a little bit. It will grow on you instantly.
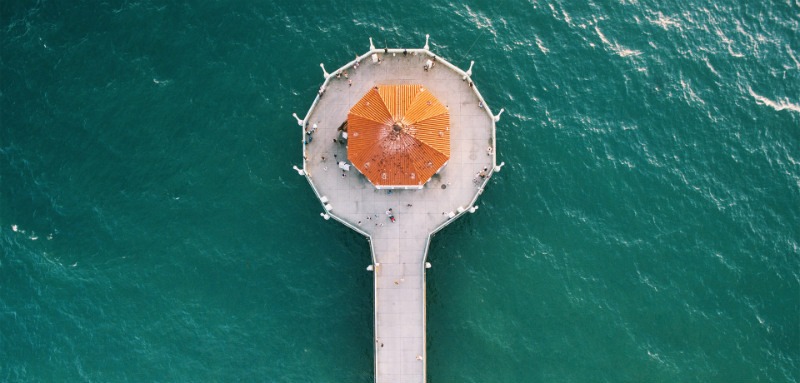
Bonus Tips: Shooting With Drones
Because there’s a big hype around drones these days, and you can buy one for much cheaper than you could a couple of years ago, we’ve decided to include a quick list of tips for the drone owners out there.
ND Filter
This will be your new best friend as a drone owner.
Neutral density filters act like shades for your drone’s eyes.
The reason you want to use these filters is because drone cameras have the tendency to overexpose which results in jittery looking videos, especially noticeable on the surface of the water, roof tiles, or basically any other object with a rich texture.
You can optically correct this overexposure by putting a darker piece of glass over your camera’s lenses – which will be your ND filter.
Depending on the particularities of the scene, you may need to use a darker or less dark filter. That’s why these often come in packs so you can pick the right one at the right moment.
Flat Image Style
Flat image style refers to a setting you can select from the menu of the camera which will basically turn off any artificial altering of the image.
It will let you film without having the camera changing up the colours, brightness, saturation or contrast at all.
This will result in a dull (kind of grey-ish) video, but it will give you more room to play around with the settings when you get your video edited…
You can bring out certain colours more, you can make the video more or less saturated and so on and so forth.
Basically, you get to decide later in the video editing stage what you want to do with your film and how you want it to look like.
If you don’t really have the time or you’re not in the mood to handle this yourself, you can always outsource video editing to someone else. Just make sure you make your requirements crystal clear.
Colour Match
Last but not least, if you’re going to combine shoots from different cameras into your final travel video, you’ll need to colour match all of them so that everything looks the same.
By default, iPhone videos will look different to GoPro or drone videos. You don’t want that to be noticeable in the final cut.
All video editing software will allow you to colour grade and match your videos.
Over To You!
With that being said, we can’t wait to see you taking your travel videos to the next level.
Look at these tips more like general guidelines rather than strict rules and get creative with your filming.
Making videos is all about creativity and having fun at the end of the day!
Love these vacation video creation tips? Save this on Pinterest >>